


Circles. They are both the best thing and worst thing about Google+. They're great because they allow you to fine-tune who you're following and who you want to keep in touch with, making it easy to keep your family and friends separate from each other. On the other hand, they can be a pain to maintain, and you can easily become overwhelmed from the "noise" of popular posts, which make it hard to concentrate on some of the people you want to focus on. But if you invest a little bit of time in the beginning to create your circles, your Google+ experience will run a lot more smoothly.
Google+ recently announced a few updates that should make using the circles feature much easier. Go to your circles tab and check them out!
+Brett van Zuiden announced the ability to reorder your circles by clicking and dragging them in your circles tab into the order that you'd like. The default order of the original circles is Friends, Family, Following and Acquaintances, but now it can be whatever you want. (I'm not sure what the deal is with the giraffe at the end of the video.)
You can also view the people located inside one circle by dragging that circle from the bottom half of the page to the top. This feature is called "Circle in Tab". And now, +Eric Cattell announced that you can add people to multiple circles, and create on-the fly circles.
Step 1 Invite People to Join Your Circles
The easiest way to invite people en masse is to use the address book uploader. If you use Outlook Express, Apple Mail, Thunderbird or similar email programs, you can easily export your contacts. Google+ can accept the following formats: VCard, VCF and CSV. Once you've exported your contacts and saved them onto your computer, go back to Google+ circles and click on the Upload address book link.
You can also click on the Yahoo! or Hotmail buttons to import those contacts. If you want to add your Facebook friends, you'll have to use the Yahoo! workaround... Create a new account for this purpose or log into an existing Yahoo! Mail account. Click on contacts, then import from Facebook.
Step 2 Create the Base Circles
Google+ starts you off with four circles: Friends, Family, Following and Acquaintances. I suggest splintering them off further and saving the Following circle for later (see next step). For example, your Family circle might expand to include Cousins and/or In-laws. Your Friends circle might be split into your Bowling Team, Girlfriends, Dinner Buddies, etc.
It's also okay to have overlapping circles. You can put people in multiple circles, so go ahead and put your best friend in your Dinner Buddies and Girlfriends circles.
Step 3 Create Your Following Circles
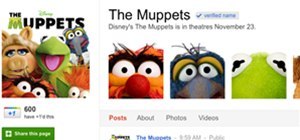
Did you notice I said circles? A lot of the attraction of Google+ is being able to get up close to great conversationalists who draw a lot of comments for their thoughtfulness and intelligence. People like +Tom Anderson, +Robert Scoble, and +Guy Kawasaki are providing insightful commentary on the tech industry today, and you can talk to them directly.
However, because they are so popular, they can also end up taking over your stream, burying the more infrequent posts from people you actually know and care about. Put these people in their own circles, so that you can check in on them when you have the time.
Don't follow people who don't post! I know it's fun and ironic to follow someone like +Mark Zuckerberg, but he's never going to post. Adding a lot of people who don't post is a great way to clutter up your circles. Add people you're going to read, people you're going to talk to, people you really want to share with and those that you're genuinely interested in.
Separate your circles by interest. Are you following people who are hardcore photographers? Or are really interested in politics? Put those people in separate circles and you'll be able to keep up with them more easily.
Step 4 Create a Google+ Circle
If you want to keep up with the latest Google+ features, you should add these 13 Google insiders and the Google Community Managers to their own circle.
Step 5 Get Creative with Circles
Now that you've got your main circles all set up, it's time to be creative. Check out my suggestions for creative uses. Take advantage of the fact that you can create empty circles. Anything you share to an empty circle will show up in your main stream.
If you decide to start a circle with a dedicated purpose—i.e. an exercise journal, a food diary, etc., make a public post inviting your contacts to join that circle.
Step 6 Think About Your Audiences Before Posting
Now that you've got your circles all set up, you need to consider the fact that you have multiple audiences now. What you write for the public will not be the same as what you write for your Family circle or Friends circle.
When you post an update, Google+ will automatically default to the last circle(s) you posted to. Choose your audience wisely. The default groups are Public (everyone), Circles (all of your circles) and Extended Circles (everyone in your circles and everyone in their circles). For the Public and Extended Circles posts, remember that there's a high likelihood that someone like an employer or your boss might come across your posts. So keep it clean!
Tips
- You don't have to add everyone who adds you. When you notice a new person who's added you, check them out in your Incoming stream to decide whether you'd like to add them back.
- It's okay to keep changing your circles until you find them manageable.
- In your Android phone, you can filter the circles you want to show up in the main stream. You can view people that are nearby (but not necessarily in your circles already), your circles (everyone in your circles) and incoming (people who've added you). You can further refine your stream by selecting the Manage Views option in the Stream menu settings. Check off the circles that you want to view, and then click on Done.
Just updated your iPhone? You'll find new emoji, enhanced security, podcast transcripts, Apple Cash virtual numbers, and other useful features. There are even new additions hidden within Safari. Find out what's new and changed on your iPhone with the iOS 17.4 update.


Be the First to Comment
Share Your Thoughts